Passbook
Passbook notifications can be used to send coupons, boarding passes, event tickets or even gift cards through campaign messages. You can do the following tasks from the Add Campaign > Define Message section:
Adding a Passbook Message
To compose a Passbook message for a Campaign, follow these steps:
-
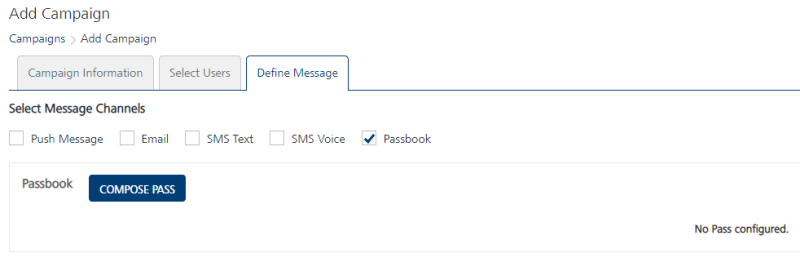
Select Message Channels: Select the type of notification as Passbook.
The Passbook Message grid appears. The passbook message grid includes a passbook label and the compose pass button to send pass messages. If no pass message is found , the system displays the message: No pass configured.
-
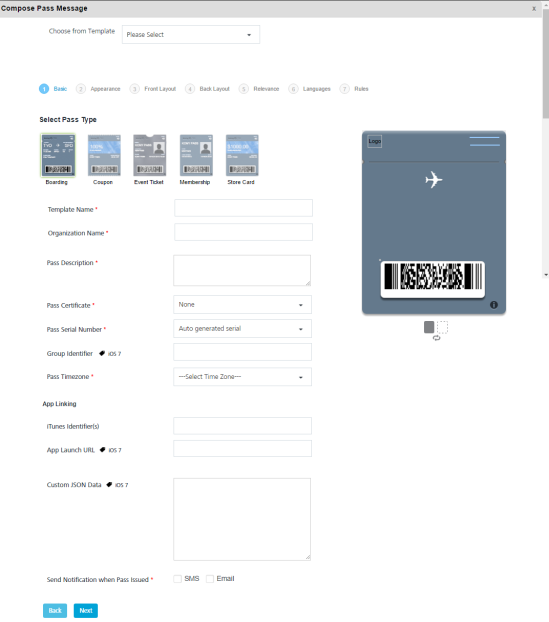
Click the Compose Pass button to compose a new pass message for a campaign. The compose pass message drop-down window appears. You can create a pass through following options:
Compose New Pass
To compose a new pass, follow these steps:
-
Based on your requirement, you can create the pass message. To know more about how to create a pass message, see Adding a Passbook Template
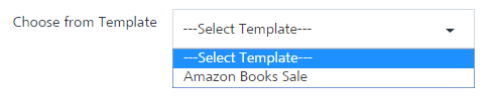
Compose from Template
-
Creating from existing template: Select the required template from the Compose from template drop-down list. The selected Pass Type Template appears on the screen.
Based on your requirement, you can update the existing template. To know more about how to update an existing template, see Adding a Passbook Template
-
-
-
Click the Cancel button to close the window without saving any settings. The system displays the Add Campaign screen.
-
Click the Save button to save the settings. The newly added pass appears in the pass list- view on the Add Campaign page.

Modifying a Passbook Message
The feature allows you to view or edit a passbook message. The View Campaign page displays the following details:
| Pass Message Element | Description |
|---|---|
| Compose Pass button | The button helps you compose a new pass message |
| Message | Displays the pass message details |
| Open/Sent | Displays the number of pass messages opened or sent |
| Delete button | The button helps you delete a pass message |
| Pause button | The button helps you pause a campaign |
| Stop button | The button helps you stop a campaign |
| Cancel button | The button helps you cancel any changes in a campaign |
| Update button | The button helps you update a campaign |
To view or modify a passbook message, follow these steps:
-
In the View Campaign screen, under the Pass column, click the required pass message name in the list view.

The Compose Pass Message drop-down window appears.
-
Based on your requirement, create a new pass message or Create from Existing Template
- Based on your requirements, do the necessary changes. For more details, see Modifying a Passbook Template
- Click the Cancel button to close the window without saving any changes. The system displays the View Campaign screen.
- Click Update. The updated pass appears in the pass message list-view on the View Campaign screen.
Deleting a Passbook Message
As an administrator, you can delete any pass message as required.
To delete a passbook message, follow these steps:
-
To remove a passbook, select the Delete button in the list-view.

-
The Confirm Delete message appears, asking if you want to delete the selected campaign message.
- Click Cancel. The Confirm Delete dialog closes without deleting any pass message.
-
Click Ok to continue.
The pass message is removed from the list-view.
Important: A pass does not have repeat configuration. To send a repeat pass, you can update the same pass and Engagement services handles the delivery of updated pass automatically.