User Guide: How to Add an Environment
Environments - On-Premises
You need to create an environment to publish your apps. Environments can include at least one server or a combination of all servers, such as Volt MX Foundry Integration, Volt MX Foundry Engagement, Volt MX Foundry Sync, and Volt MX Foundry Management.
Important: As a user, you must be an admin or owner to access the Environments page and perform different tasks based on your role.
Important: Ensure that your environments include all required servers that are part of an app.
For example, if your environment contains only Volt MX Foundry Sync, and you try to publish an app with Volt MX Foundry Engagement, the system throws an error.
How to Add an Environment
You can add environments with different combinations of servers.
To add an environment, follow these steps:
-
In your Volt MX Foundry account, in the left-pane, click Environments. The Environments page appears.
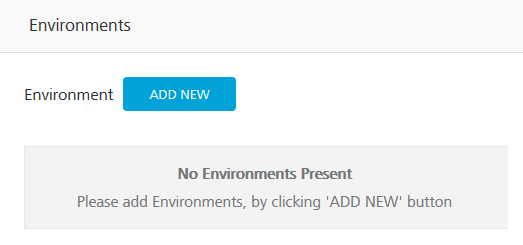
-
Click the ADD NEW button. The Add a New Environment dialog appears.
-
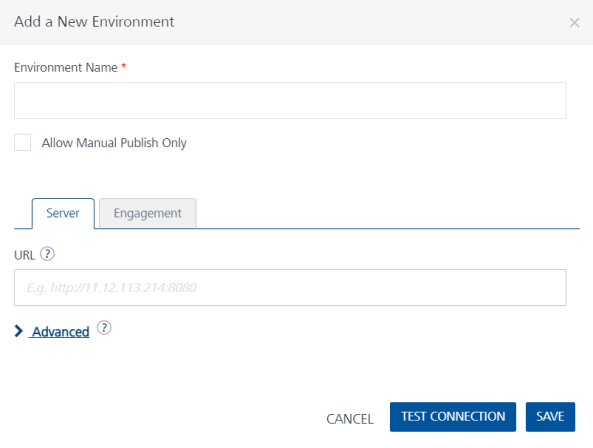
In the Environment Name text box, enter an environment name.
Note: Your Environment name can only contain letters, numbers, and hyphens (-). A hyphen cannot appear at the beginning or at the end of a name. A number cannot appear at the beginning of a name. A name should be a minimum of three characters and a maximum of 20 characters long.
-
Select the Allow Manual Publish Only check box for not publishing the .war file if you have uploaded it for Web platform under the Manage Client App Assets tab. By default, the Allow Manual Publish Only check box is cleared.
-
In the services section, follow these steps.
The Add a New Environment dialog contains the Server, Engagement, Sync, and Management tabs. The input values are URL, username, and password. By default, the system will display the Server tab.
-
In the Server tab, provide the following details:
- URL: Enter the URL for your Volt MX Foundry Integration.
The URL format is:<http or https>://<server_host>:<server_port>
For example, a sample URL:http://mbaastest30.hcl.net:53504 -
Under Advanced:
-
Feature Username: By default, this field shows the default username of Volt MX Foundry Integration. You can modify the username, if required.
-
Feature Password: By default, this field shows the default password of Volt MX Foundry Integration. You can modify the password, if required.
-
Note: You need to modify the username and password only if these credentials are changed via Volt MX Foundry Server Console.
- URL: Enter the URL for your Volt MX Foundry Integration.
-
Click here to configure other environments such as Engagement, Sync, or Management.
-
To configure the Volt MX Foundry Engagement, click the Engagement tab, and provide the following details:
-
URL: Enter the URL for your Volt MX Foundry Engagement.
-
Under Advanced:
-
Feature Username: By default, this field shows the default username of Volt MX Foundry Engagement. You can modify the username, if required.
-
Feature Password: By default, this field shows the default password of Volt MX Foundry Engagement. You can modify the password, if required.
Important: Support for Volt MX Foundry Engagement is available from Volt MX Foundry Engagement Version 6.0.1 onwards.
-
-
-
To configure the Volt MX Foundry Sync, click the Sync tab, and provide the following details:
- URL: Enter the URL for your Volt MX Foundry Sync.
-
Under Advanced:
-
Feature Username: By default, this field shows the default username of Volt MX Foundry Sync. You can modify the username, if required.
-
Feature Password: By default, this field shows the default password of Volt MX Foundry Sync. You can modify the password, if required.
- To configure the Volt MX Foundry Management, click the Management tab, and provide the following details:
- URL: Enter the URL for your Volt MX Foundry Management.
-
Under Advanced:
-
Feature Username: By default, this field shows the default username of Volt MX Foundry Management. You can modify the username, if required.
-
Feature Password: By default, this field shows the default password of Volt MX Foundry Management. You can modify the password, if required.
-
Once you enter details, click TEST CONNECTION.
If the server details are correct, the system displays a check mark next to a service, shown below: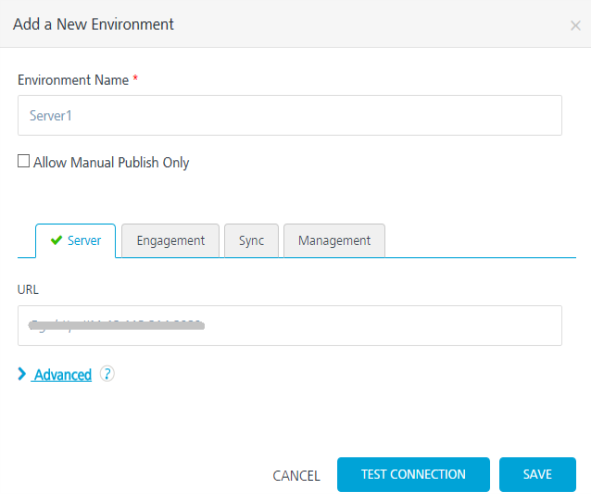
Important: The system allows you to add a unique server URL to only one environment.
If a server is already configured with an environment and you try to add the same server to another environment, the system will throw an error, shown below:

Click OK to confirm. -
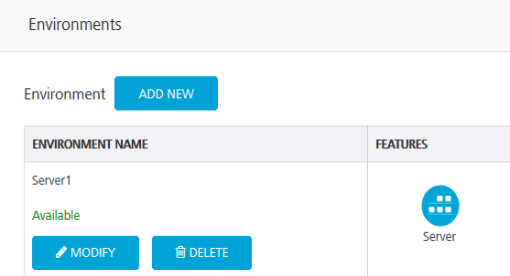
Click SAVE to apply the environment capabilities. The environment is created in the Environments page.
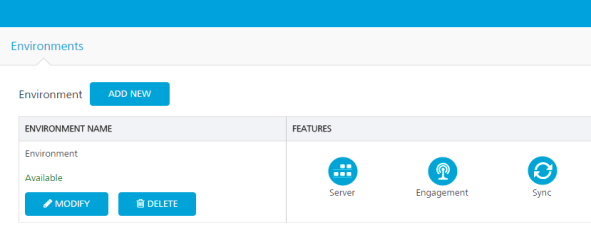
The Environment list view displays the following columns:
- Environment Name: Displays the name of the environments.
- Administration: Displays servers configured for an environment such as Volt MX Foundry Integration, Volt MX Foundry Engagement, Volt MX Foundry Sync, and Volt MX Foundry Management.
How to Modify an Environment
The Volt MX Foundry Console allows you to view as well as add servers to an environment.
To modify an environment, follow these steps:
- In your Volt MX Foundry account, click Environments. The Environments page appears.
-
Click MODIFY for an environment.

The Modify Environment page appears, shown below:
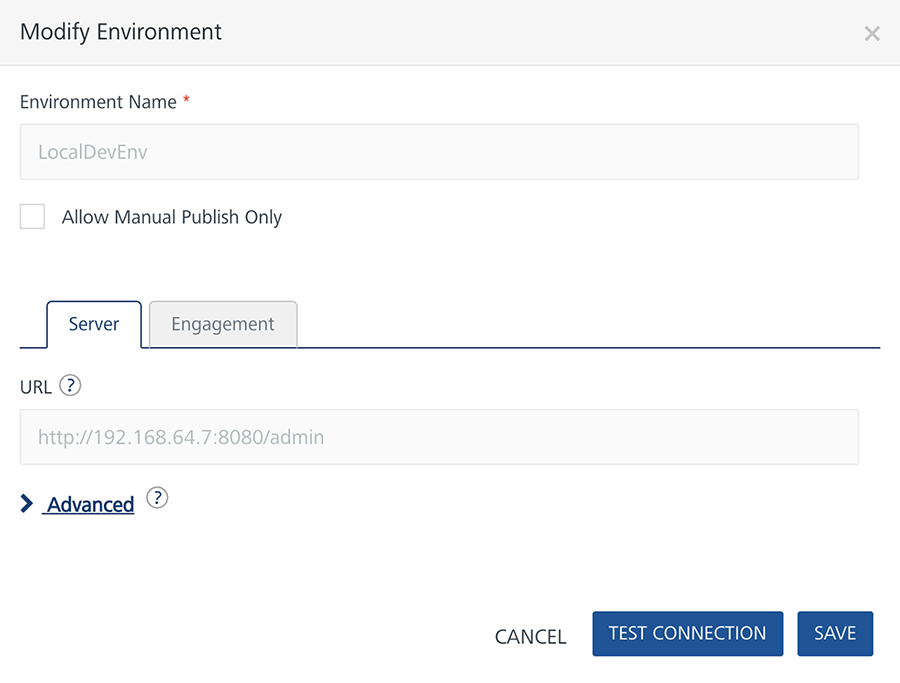
You cannot edit the Environment Name and URL fields.
-
You can modify the environment, if required. Select the Allow Manual Publish Only check box for not publishing the .war file if you have uploaded it for Web platform under the Manage Client App Assets tab.
-
Click other tabs to add servers.
- Click TEST CONNECTION to validate the details.
- Click SAVE.
Note: You can view all the applications published to a Runtime Environment. Refer to Applications Published to a Runtime Environment.
How to Delete an Environment
When an environment is deleted, the system deletes the environment and its data from the console.
-
In your Volt MX Foundry account, click Environments. The Environments page appears.
-
In the Environment Name column, select an environment, and then click DELETE.
The Delete confirmation dialog appears, shown below:
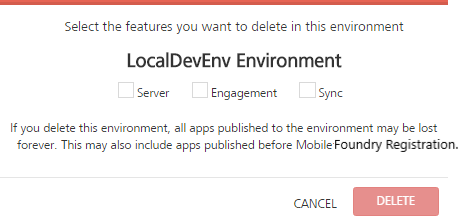
Note: The DELETE button dims when you have not selected any check boxes for an environment. When you select a check box for an environment, only then the DELETE button is available.
-
Select the check box for each of the listed environments and click DELETE.
The system deletes the environment from the grid. If you delete this environment, all apps published to the environment may be lost forever. This may also include apps published before Volt MX Foundry registration.
Note: You can view all the applications published to a Runtime Environment. Refer to Applications Published to a Runtime Environment.