Adding Events
Adding an event involves the following steps:
- Enter event details.
- Compose the event message.
- Save the event.
- Activate the event.
- Call API Payload to enable events for notifications.
To add an event, follow these steps:
-
On the Events home page, click the Add Event button.
The Add Event page appears. The Add Event page includes two tabs: Event Information and Define Message. By default, the Event Information tab is set to Active.
Event Information
-
In the Details section, enter details for the following fields:
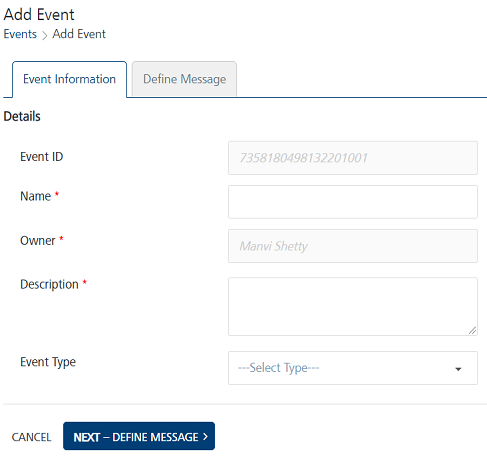
- Event ID: The field displays the system-generated event identification number. You cannot modify an event ID.
- Name: Enter a name of the event. The event name can be a maximum of 50 characters.
- Owner: The field displays the name of an event creator. You cannot change the owner details.
- Description: Enter the event description. You can enter only alphanumeric characters. If the description exceeds the existing message box area, a scroll bar appears.
-
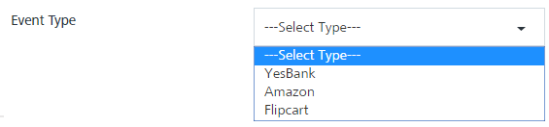
Event Type: Select the event type from the Event Type drop-down list.
Note: The Name and Description fields are mandatory. If you do not enter the details, the system displays an error message that information is required.
-
Click Next-Define Message to continue.
The Define Message tab becomes active.
Define Message
-
In the Select Message Channels section, do the following:
Based on your requirement, select a channel to compose an event message. You need to select at least one channel: push, email, SMS, or pass to send event notifications.
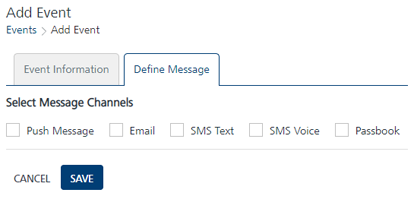
Note: When an email, push, or SMS channel is selected, you can define name-value pairs in the message. The name-value pairs are replaced with the actual data when the event message is sent, such as county-zipcode (Los Angeles-91001).
For pass messages, you can choose an existing pass template or create a new pass to send as the event message.You can set channel priority to send messages to users through the Settings button available on the Events > Define Message page. For more details, see Events: Setting Message Priority