Windows
Windows Platform has two sections:
- MPNS
- WNS
-
To configure Windows platform, enter details for the following fields:
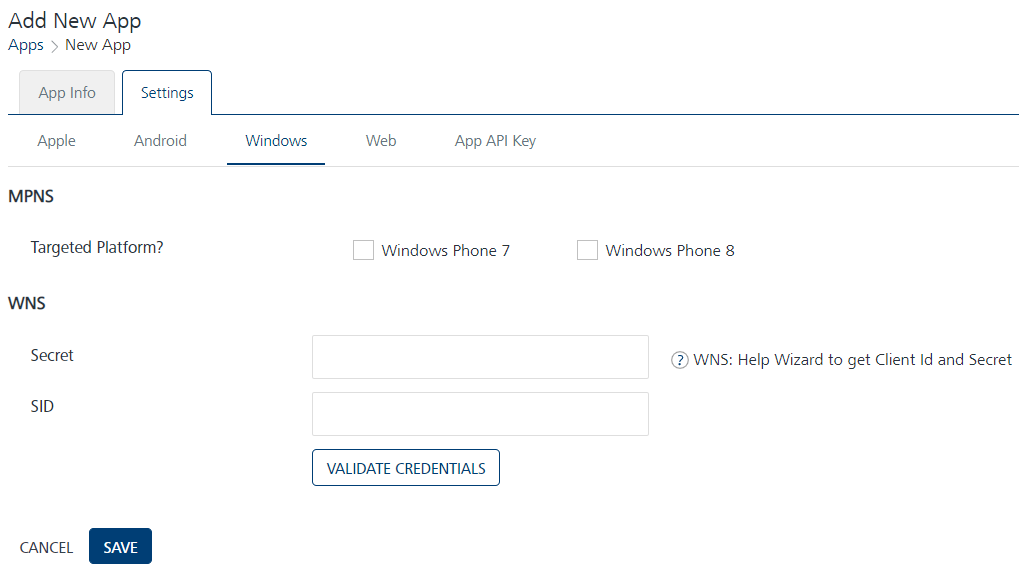
MPNS
-
Targeted Platforms: In Windows Phone 7 and Windows Phone 8 sections, select appropriate check boxes to enable as targeted platforms.
If secure communications is needed, the Windows push certificate can be used. This is a purchased SSL certificate, which is converted into the correct format to upload on Volt MX Engagement services. It is not required and can be used only when secure communication is needed.
Note: You can access more help on how to subscribe for MPNS by clicking the MPNS: Certificate Help Wizard button.
- Certificate (P12): Click the Choose File button to upload the certificate for Windows.
- Certificate Password: Enter the password for Windows.
- Click Validate Credentials.
WNS
-
Windows Secret is an associated secret key that contains strings used for authentication with Volt MX Engagement services APIs. Windows Secret is used for authentication on the client side during registration.
Windows SID is a security identifier that is a unique identifier of a user, user group, or other security principal, and cannot be changed. A security principal has a single SID for life, and all properties of the principal, including its name, are associated with the SID. The design allows a principal to be renamed (for example, from "John" to "Jane") without affecting the security attributes of objects that refer to the principal.
- Secret: Enter the secret key details.
- SID: Enter the SID details.
-
Click Validate Credentials.
If credentials are valid, the system displays the Notification dialog stating that the Windowscredentials are valid. Click Ok to continue.
Note: You can access more help on how to subscribe for WNS by clicking the WNS: Help Wizard to get Client Id and Secret button.
-
-
Click Cancel, if you do not want to add Windows platform.
- Click Save to save the specified details and proceed. The newly created app appears on the Apps home page. The default status is unpublished.