
Demo App QuickStart Guide (Building a Sample App – iOS): Configuring Email and SMS Providers using Engagement Services Console
Configuring Email and SMS Providers using Engagement Services Console
The section explains how to configure the email and SMS service providers using Engagement services console. Configuring the SMS and the email service providers enables you to send the email and SMS notifications to users and subscribers.
To configure email and SMS service providers, follow these steps:
- Open an Internet browser.
-
Enter the URI: manage.hclvoltmx.com in the address field and press the Enter key.
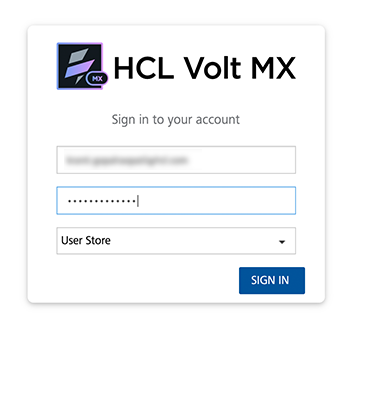
The Sign in to your Volt MX Account page appears.
-
Enter your email ID and password as user-credentials.
-
Click the Sign in button to continue.
The system displays the VoltMX Foundry homepage.
-
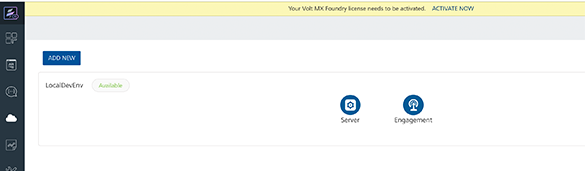
VoltMX Foundry home page: Click Environments in the left panel.
The Clouds page appears.
-
Click the Engagement Services tab next to the Sync Services tab.
The Engagement Services home page (Dashboard) appears.
-
Engagement services: In the left panel,under Settings click Configuration.
The system displays the Configuration page.
-
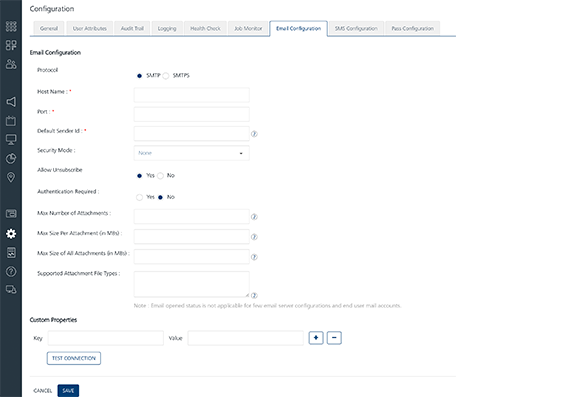
Click the Email Configuration tab. The Email Configuration page appears.
-
To set Email Configuration, follow these steps:
-
Email Configuration: For email configuration, enter details for the following fields:
- Protocol: Select the Protocol as SMTP (Simple Mail Transfer Protocol) or SMTPS (Simple Mail Transfer Protocol Secure). By default, the protocol is set to SMTP.
- Host Name: Enter the host name details. This host name is used for communication on the network, for example,
xxxxx.xxxxx.net. - Port: Enter the port number for the outgoing mail server.
- Default Sender ID: Enter your email ID. The system uses the default sender email ID to send email notifications, for example,
xxxxx@xxx.com. - Security Mode: Based on your requirement, select the security mode from the drop-down as None, SSL (Secure Sockets Layer) or TLS (Transport Layer Security).
- Allow Unsubscribe: By default, the Allow Unsubscribe option is set to true. Based on your requirement, select the option as Yes or No. If the Allow Unsubscribe option is set to false, the users who receive the email notifications, do not have an option to unsubscribe from emails received through Volt MX Engagement Services.
-
Authentication Required: Based on your requirement, select the option button as Yes or No. By default, the option is set to No.
If you select the option button as Yes, the Username and Password fields appear.
-Username: Enter your name in the Username field.
-Password: Enter the password in the Password field.
-
Custom Properties: You can add mail server specific custom properties to provide additional features. The custom properties can also be used to configure number of emails to be sent in one connection, for example:
-
Key: batchSize.sendEmail
-Value: integer, defaults to 30
Defining the custom properties is an optional feature in Email configuration.
-
-
Click the SMS Configuration tab. Choose Twilio as the SMS service provider.
You need to sign up with Twilio for a free trial or a paid account so that the Account SID, Auth Token, Account Name, and the Host URL are provided. The SMS Configuration screen can vary based on the SMS service provider chosen. The screen below assumes that Twilio is chosen as the service provider.
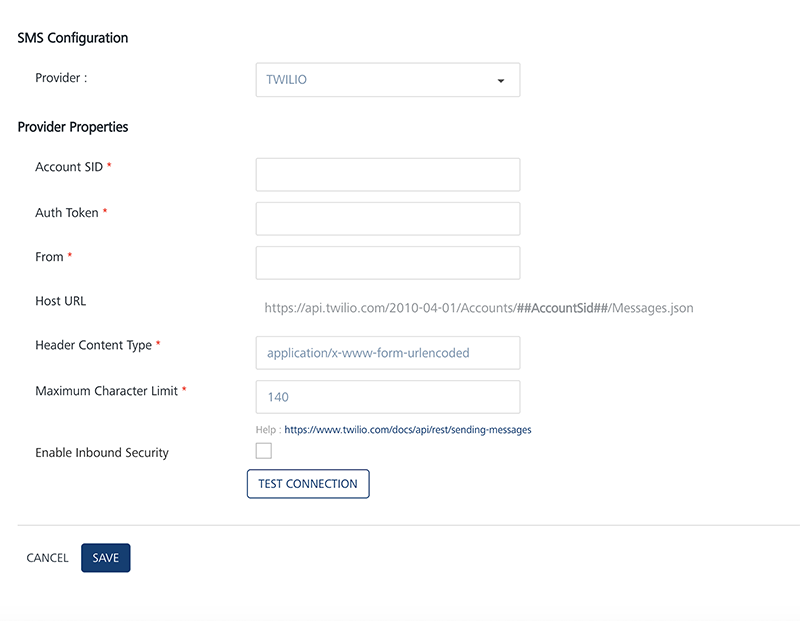
- For TWILIO, enter details for the following fields:
- Account SID: TWILIO provides you a unique Account SID for your account. Enter the Account SID in the Account SID field.
- Auth Token: TWILIO provides you a unique Auth Token for your account. Enter the Auth Token in the Auth Token field.
- From: Enter the phone number or client identifier that initiated the call. The phone numbers are formatted with a + sign and a country code, such as +16175551212. The client identifiers begin with the client URL scheme. For example, for a call from a client named xxxx, the From parameter is
client:xxxx. - Host URL: Based on a selected provider, the field is populated with the Host URL details.
- Header Content Type: Based on a selected provider, the field is populated with the header content type as
application/x-www-form-urlencoded. - Maximum Character Limit: Based on a selected provider, the field is populated with the maximum number of characters allowed in a SMS message.
- Enable Inbound Security: Select the check box, if you want to enable the inbound security. The inbound security is applicable only for HTTP and not for SMPP. For SMPP, the request origin is always from a trusted source.
- Click Test Connection to check if the connectivity is successful. The system displays the notification that connection is successful. Click OK to continue.
Rev. Author Edits 7.3.2 AU AU - For TWILIO, enter details for the following fields: